.Net Web Service Client
If you are consuming the mRDC web service in a .NET application, you can use Visual Studio to create a web service client as a byproduct of adding a Service Reference to your .NET project. Follow the steps below to create a .NET web service client.
- Download and save the WSDL file from the Downloads section to the development computer running Visual Studio.
- Using Visual Studio, create a .NET Framework project suitable for the client implementation.
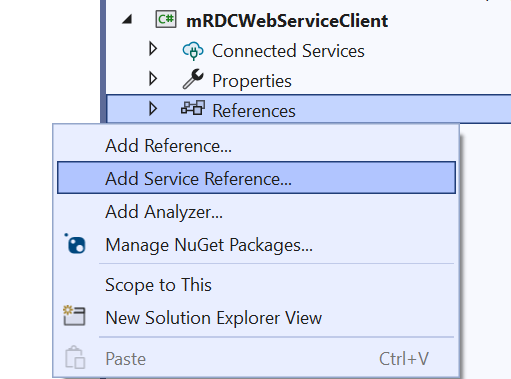
- In the Solution Explorer, expand the project and locate the References node.
- Right click the References node and select Add Service Reference.
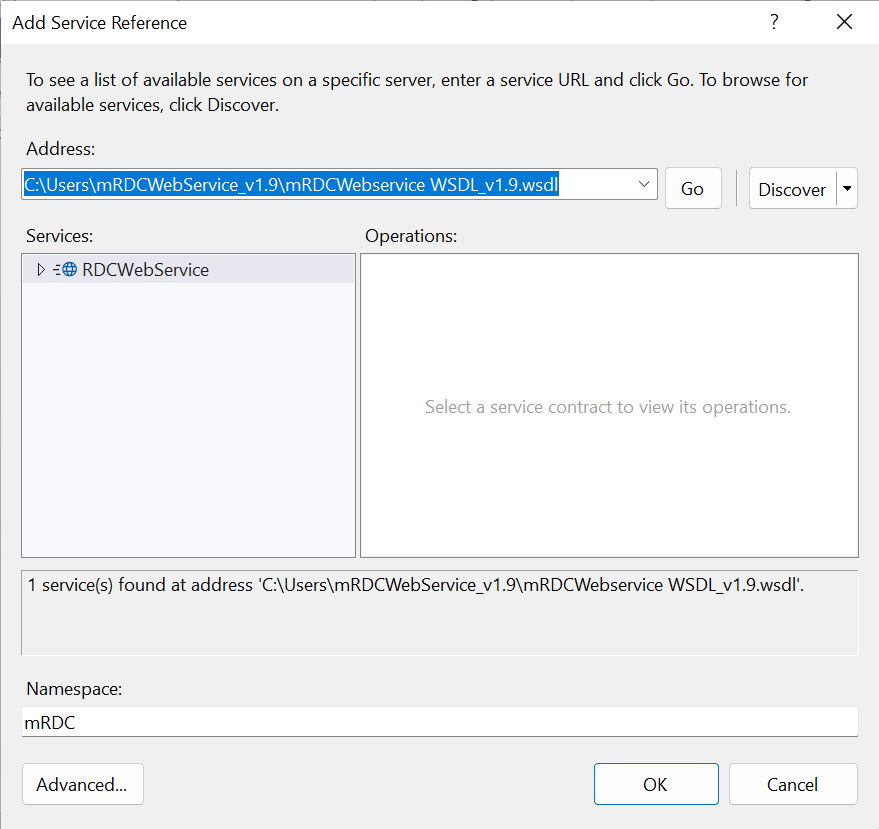
- Enter the path to the WSDL file in the Address field and click Go. This should populate the Services field with the web service defined in the WSDL file. Enter a name for the service reference in the Namespace field. You can change the default settings for the service reference by clicking the Advanced button. When you are ready, click OK to create the service reference.
In the Solution Explorer, a child node will be added under Connected Services for the new service reference.

- The web service client will now be available in the default namespace of the .NET project. In this example, the fully qualified name of the web service client will be mRDCWebServiceClient.mRDC.RDCWebServiceClient.
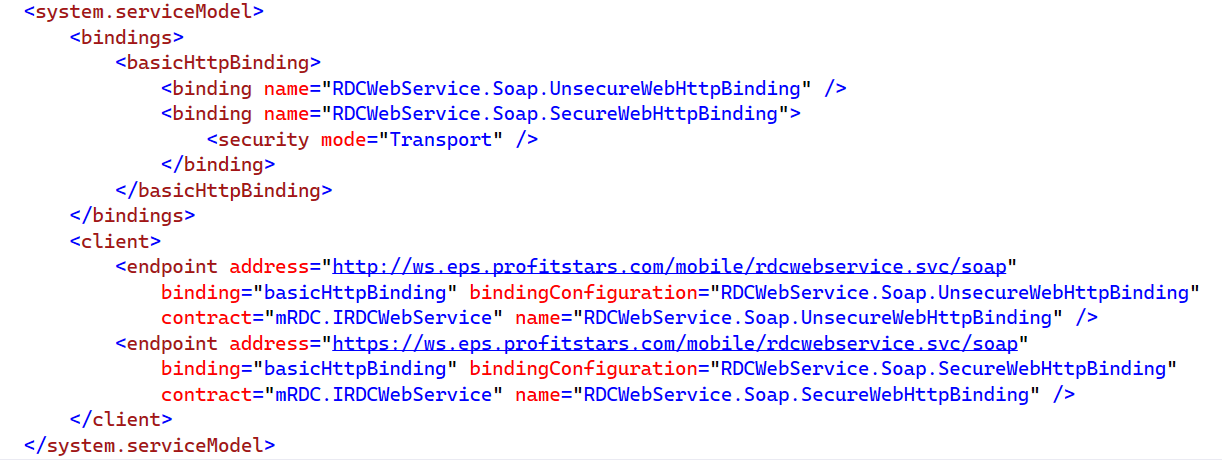
- When the service reference is added, a system.serviceModel section is added to the app.config (or web.config) file for the project. You may find that two endpoints are added - one for secure and one for unsecure communications. If both endpoints are present in the configuration file, an endpoint must be specified by name when the client instance is created. If only one of the endpoints will be used, the other can be removed (both endpoint and binding) so that an endpoint name is not required when creating the client instance.